

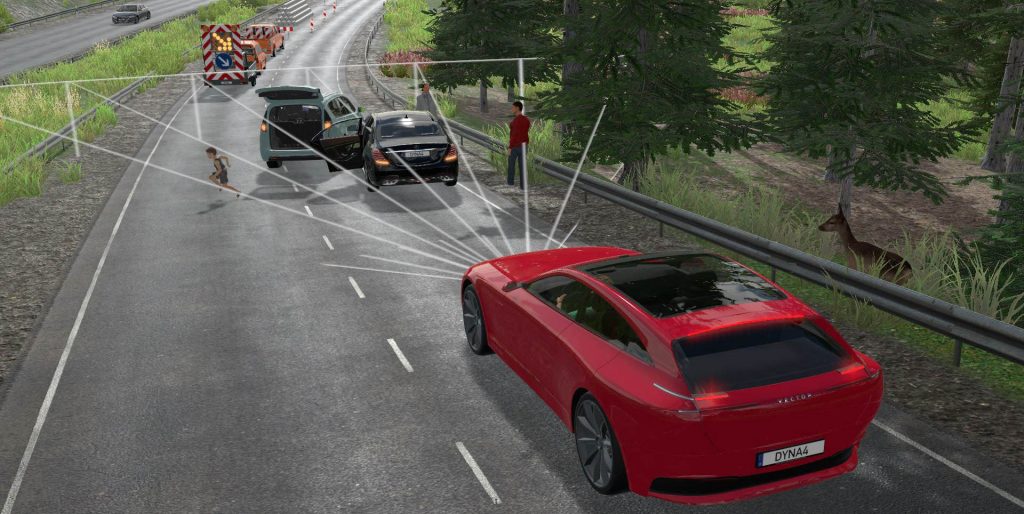
We provide a 3D animation environment for the development and testing of advanced driver assistance systems (ADAS) and autonomous vehicles. Developing and maintaining this environment is a complex task. Unlike games, where smaller bugs or something being displayed slightly differently is a minor issue, these simulations need to be deterministic and free of any errors. Although our code is tested by means of unit tests, these cannot cover everything that might go wrong when using a game engine. Furthermore, unit tests are not the best method to discover any visual errors. In our first approach to visual testing we had testers who manually executed test cases and compared their results to a reference image.
We used image-based testing to test many different aspects of our simulation:
- The visual appearance of objects (vehicles, humans, buildings, vegetation) to represent the virtual world.
- Lights of objects and the lighting of virtual scenes.
- All sorts of specialized shaders used for rendering.
- Runtime geometry generation of objects. For instance, generating road networks on the fly from OpenDRIVE files.
- Updates to the latest version of the rendering engine (Unity in our case). These updates are often required to benefit from the latest improvements and features but may break or change our visualization.
Manual execution of these test cases is rather time-consuming and monotonous. Therefore, we decided to automate the execution. This allows our testers to focus on more complex test cases and eliminates human errors caused by vague test descriptions or testers missing details. Our visual testing framework detects even small differences in hue and saturation that may be imperceptible to humans which is important when developing something that will be used to test automatic safety features in cars.
Architecture of the visual testing framework
Four parts make up the visual testing framework:
- A remote API in our application that consists of a large variety of automatic test steps.
- A test description format to specify the test steps for a given test case.
- A tool to compare one or more previously defined reference images to the current graphical outcome of the executed test case.
- A report that contains the results of all executed tests.
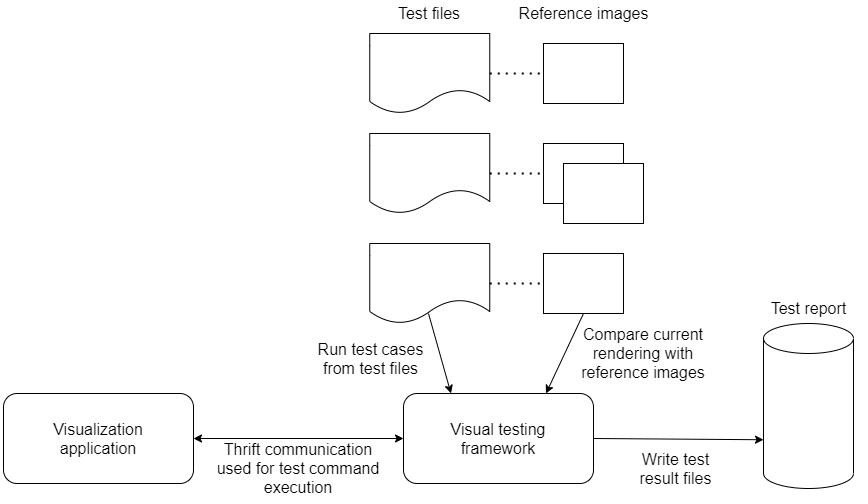
Test description and execution
We provide a test file for each test case in which we list the test steps that must be performed for this test. The simplest possible test consists of two commands. The first command loads a visualization project file which contains a scene in which we set up the features that are to be tested within the current test. The second command creates a screenshot of the currently rendered scene and compares it to a previously generated reference image, failing the test if a difference is detected.
More complex scenarios can be tested by chaining several commands together. Supported commands include, for example, a camera change to obtain a different perspective of an object or skipping to a certain time in a pre-recorded simulation. Multiple compare commands can be inserted between the other commands to verify correctness at every step.
The part of the visual testing framework that is responsible for test execution and image comparison is written in Python. Our visualization application is based on the Unity engine and is therefore written in C#. The Thrift framework is used by the visual testing framework to send the commands specified in the test file framework to the visualization application. Thrift was chosen due to its ability to communicate between applications written in different programming languages and its backwards compatibility between different versions of it.
Image comparison
For every compare command in a test we generate a reference image that displays the expected result. During a test run every one of these compare commands produces a comparison image. The comparison image is matched to the reference image and the test is marked as a failure if the difference between the two is sufficiently large. For every failed test we generate a result image that displays the difference between the two images. This image aids in debugging as it highlights even small or subtle differences.
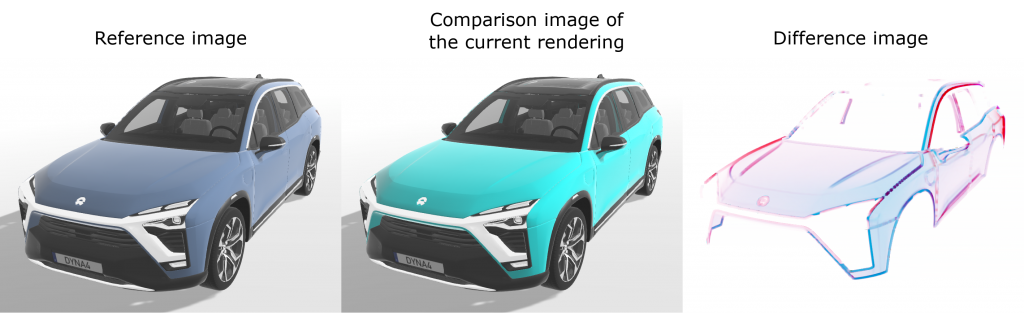
We use two different comparison methods from the OpenCV library to compare images. The faster Mean Squared Error (MSE) method is used to detect if there is any change at all, but it is not ideal to detect feature changes. The slower Structural Similarity Index (SSI) is used if MSE detected any change. It helps to get a better estimate on how large the differences between the two images are. If SSI produces a difference value that exceeds a certain threshold the corresponding test is marked as a failure. For more details on the applied methods, see the third-partyhow-to about the comparison of two images.
To further increase performance, we also tested an approach using the md5 hash of the images to avoid comparing identical images. Unfortunately rendering on different machines resulted in subtle changes that change the md5 hash while not causing any visible differences.
Visual testing reports
A Junit result file is generated to allow an easy integration into a continuous integration tool (CI) – Jenkins in our case. This allows the CI to execute the tests automatically and mark a test execution with failure or success. Additionally, an HTML report is generated which is easier to read for humans. It contains the reference, comparison, and the difference images of all failed tests. This way, a developer can quickly gain an overview of all failed tests and the differences that caused them to fail.
Conclusion
We came up with a visual testing solution that we use in our everyday developing process. Currently, our application is covered with more than 1.000 visual tests. By means of the visual testing framework several bugs were detected during our development process. We can cover most of our use cases using the current features. However, there are still some limitations in our testing framework. The following features cannot be tested so far:
- Effects that are dependent on passing time such as walking animations of pedestrians.
- Rendering effects that are dependent on some kind of randomness. For example, particle effects that are used to render rain/snow.
What are your experiences on automated testing concepts besides unit testing? Are you using a testing framework similar to the one presented in this post?